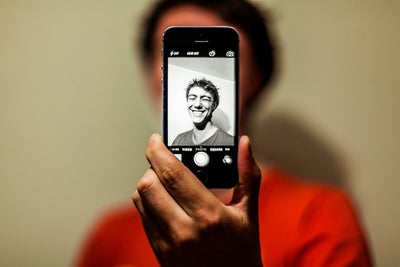
Taking Better Photos with Your iPhone

The iPhone takes great photos, but you can always improve them. For example, you can control the exposure, take more time to compose before you hit the shutter, and make better use of the tools available to you.
How to Launch and Use the iPhone Camera
You can use the shortcut in the bottom-right corner of the iOS Lock screen to launch the camera. Either press hard and release the icon (if you have an iPhone with 3D Touch) or swipe upward. You can also launch the camera via Control Center or ask Siri to launch it for you.
When the camera opens, you see all the available features at the top of the screen (as shown below).

From left to right these are:
- Flash: Choose between Auto, On, or Off.
- Live Photos: Tap the yellow icon to capture Live Photos alongside your still shots. Live Photos capture a small amount of video and audio when you press the shutter.
- Timer: Choose three or 10 seconds or Off.
- Filters: You can preview filters while you shoot. You can also disable them in postproduction if you want.
At the bottom of the screen are the various modes in which you can shoot. If you leave your camera settings in the default, it resets to Photo mode every time you relaunch the Photos app.
You can swipe left or right to access the following modes:
- Photo: Still photos with the option of Live Photos.
- Video: Shoot videos at the quality stated in the Camera settings.
- Time-Lapse: This is an automatic time-lapse mode that shoots still images at “dynamic intervals” to create time-lapse videos.
- Slo-Mo: Record slow-motion video at the quality stated in the Camera settings.
- Portrait: Devices with more than one camera can use this mode to add depth-of-field and lighting effects to portraits and other objects.
- Square: Capture square-format images.
- Pano: Shoot panoramic images by moving your phone horizontally. Your device automatically stitches the images together.
At the bottom of the screen, you see the shutter button (white for stills, red for video). There’s also a shortcut to the last photo you took in the Camera Roll at the bottom left, and a button to switch to the front-facing camera at the bottom right.
If you want to change the video quality settings, head to Settings > Camera. With the basics out of the way, we can now move on to some practical tips.
Control Focus and Exposure
The Camera app allows you to touch the scene to set focus and exposure in a single move. To lock this setting, tap and hold the photo preview screen until you see “AE/AF Lock” at the top. This makes it much easier to adjust the composition and maintain the current focus and exposure settings.
For almost total control, tap and hold to lock the exposure and focus, and then slide your finger up or down to adjust the exposure value. Often, the item you want to focus on (a cocktail, for example) isn’t necessarily the part of the image you want to expose for (the sunset, for example).
Use the Telephoto Lens (or Your Feet) to Zoom
Almost every iPhone since the iPhone 6s Plus has had at least two cameras. In the Camera app, these are denoted by the small “1x” label next to the shutter button. Tap the “1x” to switch to another camera. On the iPhone 11, you can choose “.5” for ultra-wide, or “2” for telephoto.
If you want to zoom in on your subject, it’s best to do so by single tapping the “1x.” This guarantees the best quality image because it relies solely on optics rather than digital zoom, which stretches and resamples the image. If you “pinch to zoom” beyond the “2x” point, it degrades image quality.
Compose with a Grid

Head to Settings > Camera and toggle-On the “Grid” option to see a grid overlay while you shoot your images. The overlay follows the “rule of thirds,” which splits an image into nine sections. While it can be helpful (especially to novice photographers), the rule of thirds is not the be-all, end-all of composition.
Use Burst Mode (or Live Photos) for Action Shots
Not long ago, the ability to shoot action photos or any fast-moving object with a smartphone was impossible. With a modern iPhone, though, you now have two options to do this. The first is Burst mode, which captures a series of images, and the second is to use the videos captured as part of Live Photos.
To use Burst mode, tap and hold the shutter button. Your device will continue to shoot photos until the buffer runs out (how long this takes depends entirely on the age of your device). Live Photos are not captured when you shoot in Burst mode. Instead, a series of high-quality images are saved to the Camera Roll.
Use Portrait Mode
Portrait mode uses depth-sensing technology to detect a subject’s edges and blur the background to apply a simulated depth-of-field effect. You can also use it to apply a variety of simulated lighting effects post- and pre-shoot.
Control the Camera with Your Apple Watch
The Apple Watch does many things—you can even use it as a remote viewfinder and shutter for your iPhone camera. Simply launch the Camera app on your Apple Watch to launch the Camera app on your iPhone, too. When you close the app on your watch, the app on your phone also closes.
When the Camera app is open on your watch, a viewfinder shows you what your watch “sees.” This is perfect when you need to compose group photos or selfies but can’t reach the shutter. You can tap anywhere in the frame to change the focus and exposure.
Use Filters Before or After Shooting

Did you know Apple’s photo filters are all nondestructive? This means you can tap the Filters button at the top of the Camera app, apply any filter, and then shoot as many images as you want without committing to that filter.
To remove or try any other filter, head to the Photos app, find the image you want, tap “Edit,” and then tap the filters button at the bottom of the screen. Tap “Original” to remove the current filter or choose another one.
Avoid Flash Whenever Possible

Most smartphone flashes are bad, and the iPhone’s is no exception. It works fine in a pinch, but most of the time, it results in washed-out, unflattering images. You might also draw unwanted attention to yourself, particularly if you forget to turn off the flash, and it fires while you’re on the bus or in class.
Shoot in RAW Format
You get more out of photos if you shoot them in RAW format, but this also generates a lot more data. The RAW format captures all of the “raw” data directly from the camera sensor. When you adjust the data, you can change the outcome of the image and do things like adjusting the white balance and exposure values in postproduction.
VSCO and Adobe Lightroom are two iPhone apps you can use to shoot photos in RAW format. VSCO is a much better choice as it’s lightweight and gives you plenty of options to export your images. To use Adobe Lightroom, you have to sign up for an Adobe Creative Cloud account to export your images.
With these tips and tricks for taking better images, you will be well on your way to taking much better, quality photos with your iPhone! We hope you enjoyed and learned something beneficial in the process.
The eCommsell Team